
This is the photograph I used for my front cover of my CD cover. I edited this photograph on Adobe photoshop.I edited the brightness and contrast of the photo,the colour of the photo,the exposure and hue/saturation of the photograph.
Here are the stages of development I went through before getting the photograph above to look like that.

First, I edited the brightness and contrasts of the photograph by clicking on the picture of a sun button shown on the left.Then I edited the exposure of the photograph by clicking on the +/- button shown on the left. I also edited the colour by clicking image>Adjustments>Hue/saturation and I change the Hue to more to the colour orange.

Here is a screen shot of the hue/saturation window that pop ups.
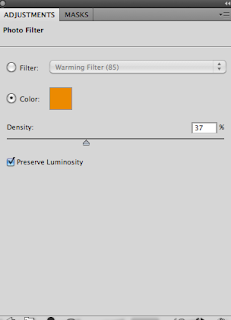
After I changed the hue and saturation of this photo.I changed the photo filter to the colour orange and I changed the density to 37%. Above is a screenshot of how I changed and adjusted the photo filter.


I cropped some of the photograph and the small bird cut off the photo, so I had to use the clone tool to clone the small bird in a different position on the photo.
No comments:
Post a Comment