Pages

Sunday 20 February 2011

Final Evaluation :)

For this assessment, we worked in a group and each half term we did different projects. Our first project we had to produce an individual stop motion video. Stop motion is an animation technique to make a physically manipulated object appear to move on its own. The object/person is moved in small movements between individually photographed frames, creating the illusion of movement when the series of frames is played, as continuous sequence. I researched different stop motion videos on Youtube and I analysed and evaluated them. I have created my own stop motion video. We then had to produce a stop motion video as a group. Our first idea was to do an gummy bears, as a stop motion video moving them around, but then we decided to do a katy perry style stop motion. Two of the members in our group, twirled around in a circle and walked towards each. One of them had a red and white dress on with blue glittery heels and the other person had a white dress on. 


I thought this project was quite easy, as the program we did the stop motion on -"imovie" was easy to use. I enjoyed this project because I learnt a new skill while making the stop motion video. We also worked with location lighting.  

Then we moved on to working with the video camera skills. I also took photographs in the studio. our group experimented with different lighting effects, with the fan and coloured gels. I enjoyed this part of the project, as liked the different coloured gels in the background and I learnt how to change the lighting in the studio. We worked with the flip cameras and the Sony HDR FX1 video camera. I thought that the flip camera was easier to carry around and easier to use, however it was poor quality. The Sony HDR FX1 video camera was better quality but it was quite heavy to carry around.


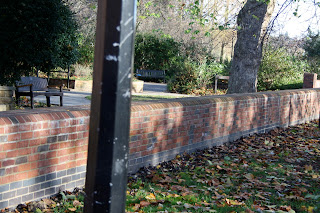
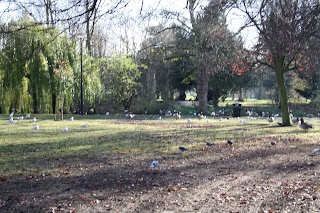
 I learnt different video techniques. We were told to go outside and test the video cameras out, we also had a list of different video technique shots we had to focus on. 

Here is the list we were given:

  • Pan shot from left to right.

  • Pan shot from right to left  (different shot).

  • Close up shot, ie, a tight shot of someone’s face clipping off the top of the head.

  • A wide angle shot taken from a low viewpoint looking up.

  • A tilt shot from low to high.


  • A tilt shot from high to low (different shot).

  • A shot which manual focuses on a person walking towards the camera and retaining focus.

  • A shot which manual focuses on a person walking away from the camera and retaining focus.

  • A ‘Pull Focus’ shot moving from a static shot onto another static shot ie, from a branch to a person in the background.


  • Here is another list we were given of video techniques:
    • The video camera / Flip Camera we are using and its functions.
    • The techniques you will be using, Pan, Tilt, and Zoom.
    • The ‘mm lens’ being used for wide angle, normal, and zoom techniques.
    • ‘Pull Focus’ technique with an explanation again in a new blog entry.
    • The advantage of ‘manual focus’ over ‘auto focus’.
    • The type of tripod you used along with a comparison to a normal photography one, main features and differences. Benefits of using a tripod over handheld.
    I enjoyed working with both video cameras, as I learnt some new video techniques.

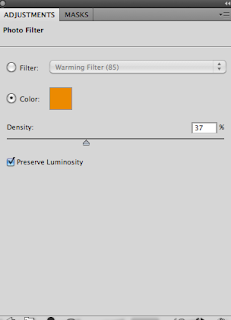
    The next project, I was asked to design and create a poster/flyer and a CD cover. I had to make up a name for my CD cover and a artist name/band for my CD cover. I also had to take photographs of what I wanted to put on the  front and back cover of my CD. I had to edit the photographs on the program called "Adobe photoshop". I had to research examples of posters/flyers and I had to research examples of CD covers to put on the blog. I was required to focus on the branding,advertising and marketing of the CD cover.


    I had to design and make some initial ideas of the CD cover ,this helped me to choose a final idea.I also had to go through a development process of how I edited the photographs and how I designed the CD cover.


    The examples of the posters/flyers helped me to design my own poster,as I incorporated the designs/design theme and colour scheme into my poster. The examples of the CD covers that I researched inspired me and helped me to do my CD cover,as I used similar designs and patterns on my CD cover. I used similar designs and patterns to the examples of the CD cover because the patterns looked interesting and distinctive. When I took the photographs,it helped me a lot,as it gave me some ideas on what I should put on the CD cover.

    During my experiments,I thought that some of the photographs that I took didn't work well,as a front/back cover of a CD,mainly because there was too much going on in the photograph and no space to write text.I also thought that it was difficult to read the text over the photograph. However there were some photographs that I took that worked well,as a CD cover.This is because the photos showed good composition and good quality.It also showed a variety of different patterns and textures in the photograph.Some of the photographs was suitable for the back cover of the CD ,as it had the right amount of space to fit the songs list on.

    For my Final CD cover, I thought that I achieved what I wanted to achieve,as the photographs that I took  went with the Band name I made up and it went with the album name I made up. The poster also went with the band name I made up.The poster was eye-catching,appealing and the font stood out.The final CD cover I made was eye catching,distinctive and it stood out. I like the front photo of this CD cover as, it shows different patterns and textures in the water. I like the different contrasts in lighting it adds a brilliant effect to this photograph. I could add a drop shadow effect on the word 'Empire of the Sun" to make it stand out more.If I was to do this CD cover again I would use thicker card to make the CD cover with.
    If I could do this assignment all over again I would make sure I worked quicker and produce better quality photographs in the studio. 


    Overall,I have enjoyed most of this this project. I have learnt new skills e.g. video techniques, photoshop skills etc. I liked the designing and creating my own CD cover the best, as it was quite a creative project and I think I took better photographs for the CD cover. 


    Friday 18 February 2011

    CD Cover: Development


    This is the photograph I used for my front cover of my CD cover. I edited this photograph on Adobe photoshop.I edited the brightness and contrast of the photo,the colour of the photo,the exposure and hue/saturation of the photograph.


    Here are the stages of development I went through before getting the photograph above to look like that.


    First, I edited the brightness and contrasts of the photograph by clicking on the picture of a sun button shown on the left.Then I edited the exposure of the photograph by clicking on the +/- button shown on the left. I also edited the colour by clicking image>Adjustments>Hue/saturation and I change the Hue to more to the colour orange.


    Here is a screen shot of the hue/saturation window that pop ups.


    After I changed the hue and saturation of this photo.I changed the photo filter to the colour orange and I changed the density to 37%. Above is a screenshot of how I changed and adjusted the photo filter.


    I cropped some of the photograph and the small bird cut off the photo, so I had to use the clone tool to clone the small bird in a different position on the photo.

    Tuesday 15 February 2011

    CD Cover: Final Design


    This is my final design for my CD cover.I chose this CD cover for my final design,as I liked the photographs,as the back cover is simple but very effective and the front cover is bright,eye-catching and appealing.I chose the sunset photograph with the church reflection for the front cover of my CD and for the back cover of my CD I chose the birds flying photograph.I thought these two photos worked well with each other. The band name is called "Empire of the Sun" and the font for this band name is called "BANK GOTHIC". The name for the album is called " Reflection" and the font name for the album name is called "VTKS Deja vu". I reflected the word reflection. This added a visually appealing effect to  this word.The colour of the word "Empire of the Sun" is purple and the colour of the word 'Reflection" is blue but I added a gradient effect on top this word to make the colour of the word Reflection different shades of blue.The font the song list at the back of CD cover is "Times New Roman". The names of the songs are in capitals and there in bold to make them stand out more.


    Wednesday 2 February 2011

    Research: Album Covers

    This image of a house links to the photographs I took for my album cover as most of my photos were took of houses/buildings/the church.  I quite like this photograph, as it goes with the album name "see this through and leave. I also like how it all links together. This photograph looks striking, as there is different contrasts in lighting, as the house is light and the car is quite dark. This is quite an unique and different photograph for an album cover.         

    The image is of a sunset with pine trees on this album cover. I like this album cover, as it goes with the album name "Come around Sundown". This photograph on the album cover captures the whole theme of the album name. I like this album cover, as it looks eye-catching and visually appealing. It also looks simple but effective.

    Wednesday 26 January 2011

    CD Cover: Intial ideas

    This is the layout of CD case.At first I was going to do this CD cover template but when I did a Mock up of this template but it was too small on A4 paper to be a CD cover.

    This template is the one I want for my CD cover.

                    Ideas for CD cover and Photos for the CD cover
        1.                                                                 2.

         3.                                                                                                              4.

       5.                                                                    6.     7.                                                                    8.                                                
        

    These are the photos I have took for my CD cover. I didn't know what photo I should have for my CD cover so, I took different photos in different locations. Some of the photos could be merged together on the program called "Adobe Photoshop".I will also edit the photo on this progam. I will add text using the text tool and change the contrast and brightness so the photo is better quality.My original idea was to take a photograph of birds flying,but while I was taking photographs I changed my mind and I decided to take photo of a church with a reflection in the river.I thought this added a good effect to the photo. Another idea I had was to have the 2nd photograph at the back of the CD cover and the photograph at the front of the CD cover.

    Photo 1
    This is photograph of the sun setting between the trees and houses.This is a long shot photograph that I took. The most important part of this photograph is the compositon;like the clouds,the light passed from them the photo got various shades and as the clouds moved and sun went further down,there were different patterns. This photo also goes with the rule of thirds as the sun is in the last third of the photograph. I like the different contrasts in lighting and I like the different textures of the trees/houses in this photograph.I don't really like how the camera doesn't focus on the sun which is the subject and the sun is too small.To improve this I would re take this photograph focused and zoomed in more at the sun to make it the subject of the photograph.

    Photo 2
    This is a photograph of a frosty bush. This is a close up photograph that I took. I like how this photograph looks like a winter photograph.I also like how this photograph is zoomed in and I like the different contrasts in lighting in this photograph.I like the different textures of the frosty bush. This one of my ideas for my front cover of my CD. I chose this photograph as an idea for a front cover for my CD ,as it stands out and looks eye-catching.


    Photo 3
    This is a landscape photograph of a church,trees and bushes.I like the composition of this photograph,as it shows the trees are the subject of this photograph.I like the positioning of the trees,bushes and the church ,as the two bushes are at the front of the photograph and I took the two bushes close up and the trees and the church are taken further away.I like the frosty look of the church,trees and bushes ,as it adds a good effect to this photo.I like how the church is hidden by all the trees,this is good as it adds texture to the photograph. There is different textures of the trees,bushes,the grass and even the some of the frost on the trees/bushes adds texture to this photograph. There is also use of different lines and shapes in this photograph.


    Photo 4
    This is a landscape photograph of birds flying and the church,trees and part of the bridge.I like the composition of this photograph,as you can see the subject of the photograph is the birds flying.I like the different textures of the trees and the church in the background.I also like how the trees and the church are further away and the trees and the church is really small,but the birds flying in this photograph are quite big,this adds contrast of different sizes.I like how this photograph is mainly of the sky,as this would be good to put on a back cover of a CD. This would be the best photograph for a back of CD cover, as there is a big enough space to write the song list in the sky. This is going to be one of my ideas for my CD cover ,as this photographs looks eye-catching.

    Photo 5
    This is a photograph of trees and a river. This is a close up photo of the trees that I took. I like how the trees are really big and they overlap each other.I like the different textures of the trees and the ground has a good texture as well.I like the composition of this photograph,as it adds a visual good effect o this photograph. This photograph is taken at a different angle and it looks like its a one point perspective photograph, as it looks like the mud on the ground is getting smaller.I don't think this would be a good photograph for CD cover because there is too much going on in the photo and it be quite to difficult to find where to place the text.It will be difficult to read the text. It also is taken at different angle so, I don't think it would be suitable for a CD cover.


    Photo 6 
    This is a landscape photograph of trees,a building and a clear blue sky. This is a two point perspective photograph.I like the different textures of the trees in this photograph,as it shows different lines of the branches. This adds a visually appealing look to the photograph.I like the colour of the sky as its clear a blue-this makes the photograph stand out.I like the different contrasts in lighting in this photograph.I don't really like this photograph,as the angle of this photograph has not been taken very well and I don't think it will be suitable for a CD cover ,as there is too much going on this photograph.


    Photo 7
    This is a landscape photograph of the church,trees and the bridge.I like how the sun's setting behind the trees. This shows different contrasts of lighting in this photo ,as there is a big burst of light this adds visually appealing look to this photograph.I like how there is silhouette of trees behind the church. This makes the whole photograph look appealing. There is different textures of the trees and the church in this photograph,as it shows contrasts of different lines of branches of the trees. I think this might be good photograph for a CD cover,as its taken at the right angle,its eye catching and it stands out. However,I think there is too much in this photograph.


    Photo 8
    This is the photograph of a reflection of a church. The composition of the reflection adds a visual effect to the photo.The shape and implied movements in any reflected element appears strengthened - it is, effectively, doubled - by its reflection if you include the subject being reflected. The Line of Symmetry is the horizon it is not perfect symmetry, because the image is changed a little by the river's surface.I like this photo as, it shows different patterns and textures in the water.I like the different contrasts in lighting it adds a brilliant effect to this photograph.This is one of the photographs I might have, as my front cover of my CD cover, as it stands out. I could edit this photograph by adding different colours this in the program called "Adobe photoshop."


    1.

    This is one of my ideas for a CD cover.I edited these photos on photoshop and I put the photos onto this template. I  edited the brightness, contrast and exposure. The font of the words "The Call of the Wild" is called "Vtks Deja Vu" and the colour of the font is bright green.I coloured the inside of this font with the paint fill tool. I decided to put these photos on as I liked the way the two birds are at each side of the songs. Here are some good points and bad points about this CD cover.


    Good Points:
    •  The font is big,bold and bright. This makes it stand out.   
    •   Its eye catching and 
    •   I like the decorative font as it stands out. 
    •   The font is distinctive.
    Bad points: 
    • The font is not clear enough as the font needs to be more simple and clearer on this sort of photo.
    • The photograph at the back - the birds are bit too blurred.


    Thursday 20 January 2011

    CD Cover: My Poster

    This is a poster I had to create for a band/aritist to advertise their tour dates.I decided to make up a band that fitted with the photograph.I took the photograph outside of the trees and then I added effects on photoshop. I changed the colour to green by changing the hue/saturation of the photograph.I thought I would add the border to enhance the photograph.The name of the band goes with the photograph. The font I used for the actual tour dates(Monday 24th October-Wednesday 26th October) is called "Vtks Revolt".The font I used for the rest of the words is called "Vtks Deja vu".I like these fonts as the decorative swirly pattern go with the branches/leaves of the trees in the photograph.There is different textures and different lighting.I also like this photograph because it looks eye catching,attractive and it stands out.

    CD Cover: Location photographs :)

    Here are some photographs that I took to give me an idea of what sort of design 
                               I would want as my front cover on my  CD cover.                             
                                       1.                                                            
                                      2.
     
                                      3.
     
                                        4.

    Photo 1
    This photograph is close up of bushes and graffiti wall. I like the texture of the leaves in this photograph and I like the different shades of green.However it could be improved by using more of the location adding more depth to the photo and more texture to the photo to make it look more interesting and the photograph is not very clear.

    Photo 2 
    This is a close-up photograph of a bench.I like this photo as it has different textures and different colours.I also like how its focused on the bench and it also shows different layers of lighting and contrasts in this photograph.This photo could be improved by editing the photograph on Adobe photoshop and making the photo a bit more brighter to make the bench stand out a bit more as its too dark.

    Photo 3
    This is a photo of a close up of a black pole and in the background of the black pole there is a bench and trees.I like this photograph because it has different layers of lighting and texture.This photo could be improved by using a better angle/viewpoint to take the photo.

    Photo 4
    This photograph is of trees and ducks.Out of all these photographs I like this one because it has been taken at very good angle,it shows of the different texture of trees and ground,it shows different layers of lighting and it even shows the tracks on the ground disappearing to the corner which makes the composition stronger.

    Friday 14 January 2011

    CD Cover: Posters/flyers -Research

    Posters/Flyers Research
    Here are some posters that gave me some inspired me to do my poster design. 
    Here are few posters/flyers I have researched.
                            
                                          1.                                                                                2.
                     
              
                 3.                                                                  4.
          
                                       5.                                                   6.
                    
                                                                                                                                        
    Poster 1
    This is the "EventBrand poster".There is a good use of colour blends used from white to grey to bright  green to red.Its a stunning colour explosion which the eye is naturally drawn down the next and only area of colour:the EventBrand logo. The color in this piece is especially effective as it contrasts the grayscale setting. The abstract nuclear blast of color is full of energy and life, and can’t help but fail to impact the viewer.This poster is bright,colourful and attractive.All these aspects of the poster design make it look eye catching and it also looks aesthetically pleasing to the eye.

    Poster 2
    This poster is advertising for a campaign for Ikebana ,a beach resort and wellness centre.This poster very colourful,bright and attractive.It is eye catching as all the graphics/images stand out.I like how they overlapped the images/graphics it adds a good effect to the poster.I also like how its colourful and bright as it reminds of summer.This poster shows the moods/themes of summer.

    Poster 3
    This poster is to persuade more people to recycle.The font is big and bold.This makes it stand out.I like how its kept to one colour for the font and logo-green.I like how the trees come out of the text.This makes it eye catching and the images/graphics look attractive. I might incorporate some of the aspects in this poster design on to my poster design.I want to use one to 2 colours on my photograph for my poster and I want to take a photo of loads of trees for my poster.This will look good when I edit it on photoshop   
    as I will change the colour of the photograph.

    Poster 4
    The "War is Not Healthy for Children and Other Living Things"  poster. This  poster, originally done by Lorraine Schneider, first appeared in 1966 in reaction to the Vietnam War.I like this poster as it only has one or two colours on it and the background of the poster is pale yellow and the text it black to make it stand out. This poster is bright,attractive and eye catching.The font of this poster is big,bold and clear. This makes it stand out.

    Poster 5
    Since its early days, Coca-Cola has played an eminent role in the visual culture of several generations.
    By continually challenging artists and agencies to create images for its wide range of communication, Coca-Cola also functioned as a catalyst for creative expressions, right ideas at the right time…

    The original Coca-Cola illustrations were drawn by masters as Haddon Sundblom or Gil Elvgren with their loving, magical touch. Some of the early Coke images are playful, romantic, cartoony, imaginative; others are trendy and stylized but they are always signs of their times.

    The concept of the Remix project is simple. Every selected artist makes a “Coke Side of Life” Remix of historic Coca-Cola visuals and creates a new visual inspired by the brand and its soul, a thematic interpretation.

    This poster is bright,colourful and eye catching.I like the amazing burst of colour coming out of the coke bottle.The font on the poster is white so it stands out against the red background.I like the decorative swirls coming out of the coke bottle it looks attractive and it grabs your attention to the poster.

    Poster 6
    This poster has colourful graphics/images coming out of the women's head.I like how this poster can look realistic and surreal at the same time and I like the cartoony styled images.I think this poster looks bright,colourful and attractive.I like how theres a burst of colour of images coming out her head and her head is black & white.This makes it stand out.I like how the images represent her brain and what she loves?.I might incorporate some of these aspects into my own poster design such as; the colour in particular and the decorative images.

    Wednesday 5 January 2011

    Research: Album covers

    The Beatles walked across a zebra crossing in in North London street for their album cover.The photoshoot for their new Abbey Road album happened just yards away from the recording studios and took ten minutes-only six frames were taken by the photographer,Iain Macmillan,who was perched on a stepladder.It has become one of the most iconic covers in history for two reasons -no album cover has inspired more imitations and none has looked so simple but effective.   


    I like this album cover of the Beatles ,as its simple but effective.I like how the photograph used a realistic scene for the album cover and I like how the Beatles are walking across the zebra crossing with the view of the road ahead.

    This Amerie love and war album cover is very dramatic and decorative.I like the decorative detailed patterns and designs on this album cover and I like the choice of colours they used on the album cover as the red looks like blood this goes with the name of the album cover -love and War  and the artist name stands out on the red background.To improve this album cover I think they should use a less decorative font on the words "in love and war" as its not clear enough to read and the font is too detailed.

      
    Progress is the sixth studio album by British band Take That. It is the band's first album to feature Robbie Williams since 1995.The album cover was photographed by Nadav Kander, who had previously photographed Barack Obama. It mimics the iconic ape-to-man image, and has been positively received by critics.The background of this album cover is yellow,this makes it stand out.

    Irreemplazable is a Spanish and Spanglish fare album by American R&B singer BeyoncĂ© Knowles. Originally released as a bonus disc on the deluxe edition of B’Day, it was released on August 28 in the United States as a stand-alone album.I like the background of this CD cover as it looks realistic and it stands out.I like the texture of the trees/branches/leaves in the background and the colour of this photo stands out and looks interesting.I like how the font of the artist name goes with the photograph as the font is decorative and swirls at the end of some of the letters which is like the pattern of the leaves.

     The final image from the photoshoot for the album was shot by fashion photographer "Ellen von Unwerth".The black-and-white cover was compared to the outrageous 1980 album covers by singer "Grace Jones".The brand and styling of Rated R was conceived by british artist and director "Simon Henwood." He designed the "R" logo seen on the album cover,which is a two edge sword and one side symbolizes strength and the other vulnerability. He designed it as a 3D object first that changes form in rotation as an animation -it forms the logo at the end of the loop.I like this album cover as its fierce and it shows the emotion in her eyes and face.I like how its black & white as it shows darkness danger of the songs in the album.You can tell from this album that Rihanna has gone for a new look 'a more danger,fierce & edgy sort' of look. I also like how the letter R looks like its been scratched on.This also portrays a dangerous look for her.I like how she's just covering one eye.This also portrays danger and maybe pain. Overall,I think this isn't just an album cover its an album cover that shows moods,expression,emotion and feeling for what songs are going to be like.

    This is Nicole Scherzinger Album cover and its called "Poison". This is very similar to the Amerie "Love & war" album cover as its the same colours red and white.The word poison is in the colour -red this symbolizes blood and this word also projects its meaning across as the font is shaped like poison/blood.I like the paint splodges coming out of Nicole Scherzinger's bun it adds a good effect to the photo.I also like the quality of the photograph and I like the font of the word "Nicole" as its decorative & eye catching.It looks aesthetically pleasing and attractive.

    This is "The BlackEyed Peas" Album- 'The E.N.D'.So this is what you get when you combine will.i.am, Fergie, apl.de.ap, and Taboo. The Black Eyed Peas have released the digital image that is the cover of their album The E.N.D. It is a digital composite of the group.The artwork arrives as a headshot of a person with the name of the Hip-Hop group and the title of their new effort attached on his forehead. I like this album cover as it shows a limited amount of colour which is good as the more simple an album cover looks the better and more effective it looks.I also like how this digital image was developed and manipulated on the computer. I think it looks like a robot.The colour of the font is white which stands out on the digital image.I think looks simple but effective, eye catching and it stands out.

    Research: Album Covers

    Introduction
    For this part of the course I have to design and produce a album cover that will show a photograph that I have took and I will put the songs at the back of the cover.I need to decide on if I am going to keep my cover simple or complex and I also need to decide on a name for my album cover. I will also design a poster for my CD cover.

    Nigel Barker -Fashion Photographer :)


    Nigel Barker 
    Nigel Barker(born 27th April 1972) is an fashion photographer.He is best known for his participation as a judge and photographer on the reality show "America's Next Top Model". He was born in london. As well as, being a photographer,he was also a model and its because of his modelling,Barker's love for fashion grew and in 1996 he decided to become a photographer.Nigel opened his own photo studio,StudioNB in the now-fashionable meat packing District in Manhattan

    This photograph was taken by 'Nigel Barker'. In this photograph Barker has created a sense of movement and fluidity.The background of this photo is grey to make the woman in the pale green dress stand out.Her eyes are fixed/staring at the same position and her right arm is bend and her hand is on her head.Her left hand is holding her dress and this photo has been took so the sideways on but her face is facing the camera.
    This photograph is an advert for a "Rocky Mountain high. I like the pose that the woman is doing, as her eyes are fixed on one point. I like the background, as its relevant to the name of the advert. I like how there is a close up shot of the woman and a long shot of the mountains in the distance. The lighting is good quality in this photograph. I like the detail and composition that this photograph has been taken.


    This photograph is of a woman sitting down with her hand on her chin  and her eyes I staring at the camera. I like the facial expression on the woman, as it goes with the whole photograph. I also like how the bird is on her hands. In this photograph the woman is in focus and some of the props are out of focus. The lighting is good quality in this photo, as its hits the woman's face and shows of her makeup really well.  I think this photograph is good, as its clear and eye-catching.